Exchange 2010 Self Signed Certifcate Error

Some years ago, I cannot recall, Go Daddy along with many other SSL certificate providers stopped supporting Subject Alt Names (SANs) that had the local FQDN of your mail server. Example: mailserver.interanl_domain.local. Email servers today need to have a UCC certificate. There are many places where you can obtain free certificates , such as STARTSLL.com. As of late, Go Daddy was instumental in getting some StartSSL IP address black listed. This issue has been resolved and they are back in business. Obviously, free vs 400/ 3years is a good deal.


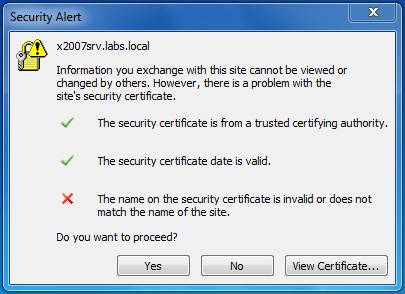
The above error is experienced by internal users after the new SSL certificate is imported. You may also find that your OWA and email accounts on your cell phones have stopped working.


Here is our most recent scenario. Our customer wanted to be able to securely access their email from home using Outlook 2016. Exchange/Outlook 2010 use RPC over TCP while Excchange 2013/2016 use RPC over HTTP. We did what anyone would do. We purchased a UCC SSL certificate from Go Daddy and added the following SANs.


-autodiscovery.domainname.com

-mail.domainname.com

-rdp.domainname.com (for future use)


NOTE: there is not an entry for mailserver.internal_domain.com. Herein lies the crux of the issue.


The moment the new SSL was imported, the internal users began experiencing the above error message, OWA went down and cell phone email accounts stopped. The isses are all related.


Issue 1:  you will see the mail_server.internal_domain.local at the top of the error. When you view the SANs in the certificate, you will note that it is using the newly imported certificate purchased. mail_server.internal_domain.local is not and cannot be one of thse SANs. So how do you resolve this issue? Simple. It's a binding issue. I will say that we had fun perfoming these same steps on an older Exchange 2007 server as well.


Note that the https .443 * is bound to the new Go Daddy certificate. This is correct. What we need to resolve the above error is verify the where the server is being pointed internally to resolve mailserver.internal_domain.local. This can be done using two different methods.


Method1:

Step 1: Open Outlook on your workstation exhibiting the error message

Step 2: Click the up arrow at the bottom-right near the clock

Step 3: Hold the CTRL key and right click the Outlook icon

Step 4: Click Test email autoconfiguration…

Step 5: Uncheck Use Guessmart and Secure Guessmart Authentication

Step 6: Click Test

Step 7: Click the Log tab.


NOTE: Below is an example of a correct configuration

Method 2:

Step 1: Open Microsoft Exchange Management Shell

Step 2: Type the following commands one by one to view the necessary information

Get-ClientAccessServer | fl *wri*

Get-WebServericesVirtualDirectory | fl identity,*url*

Get-OabVirtualDirectory | fl identity,*url*


NOTE: the InternalINLBByspssUrl and Internetal Url are incorrect. They are point at the .Local instead of the mail.domainname.com

You may also want to check the binding and IIS and the services applied to the newly imported certificate to make sure they are correct.


  • https .443 * should have the newly imported certificate assigned to it.
  • The newly imported SSL certificate should have at least SMTP and IIS assigned to it. In this example, SMTP, POP, IMAP and IIS are assigned.

Remember to set the SMTP service on your certificate in the Exchange Management Console. Open the EMC, click Server Configuration in the left pane. Select the Internal Certificate, right-click, Assign Services to Certificate, click Next, select SMTP, click Next, Click Assign. Click NO when asked if you want to overwrite any other certificate.   

Now that we've identified the issue in Methods 1 and 2, let's address the resolution. First, I would like to draw your attention a MIcrosoft KB929395 article that will assist greatly.


Return to the Microsoft Exchange Mangement Shell and modify the following commandlets to your needs.


  • Set-ClientAccessServer -Identity SERVER -AutodiscoverServiceInternalUri https://mail.external_domain.com/autodiscover/autodiscover.xml
  • Set-WebServicesVirtualDirectory -Identity "SERVER\EWS (Default Web Site)" -InternalUrl https://mail.externeral_domain.com/ews/exchange.asmx
  • Set-OABVirtualDirectory -Identity "HLTDC\oab (Default Web Site)" -InternalUrl https://mail.external_domain.com/oab


Now you can use Methods 1 or 2 to verify the changes. We're not done yet. Now we need to modify the internat DNS server. It will require a new zone file with the name mail.external_domain.com


In an effort to shortcut the process, we've posted an image of what your DNS should look like once you've added the new Zone highlighted in yellow. This should point to the internal IP address of the Exchange server. You will then need to do an IPCONFIG /FLUSHDNS on the Exchange server.

We're almost done. You now need to restart the autodiscovery app pool in IIS .


Step 1: Open IIS

Step 2: Click Application Pools

Step 3: Right click MSExchangeAutodiscovery

Step 4: Click


This will complete the process. If you require assistance, please leace a message within the Blog and we'll be happy to assist you.